
Google has added FRP (Factory Reset Protection) on all present-day Android smartphones. After the process of Factory Reset, the phone will ask the user to enter the last used Google account to verify the actual owner of the device. No doubt it is a good feature to avoid misuse of the device. But due to the huge number of FRP unlock requests, here FRPBYPASS.IN provides the best solution to FRP unlock. In this tutorial, I will guide you to Xiaomi Redmi 9i FRP Bypass | Unlock Google Verification (MIUI 12) without PC very easily. So, follow the below process carefully.
What is FRP?
Android has added the FRP feature in 5.0 Lollipop and the upper version. FRP means Factory Reset Protection and it’s working on most of the latest Android versions (Lolipop, Nougat, Marshmallow, Oreo, pie & Q). Google also pushed security patch update every two months to fix the old FRP bypassing process so that’s why nowadays FRP unlock process has become too challenging with every phone and Android version.
The FRP will automatically activate when a user added a new Google Account ID and Password on your Xiaomi Redmi 9i for the very first time. If you performing the factory reset, then your device will ‘be stuck at the FRP lock verification screen. Now you have to log in with the same Google Account and Password that you set up on your phone earlier. In case, if you lost or your Xiaomi Redmi 9i got stolen then It can’t be accessed by anyone. Here on this page, I share with you a simple and fully working methods to Xiaomi Redmi 9i FRP unlock successfully.
How to Disable FRP Lock
The process of disabling the FRP lock is very easy. Just you have to follow these simple steps to disable it easily: Just Goto Settings -> Accounts -> select the Google Account -> check on the right side you will see Delete icon. Just delete the account from there.
The process of FRP Bypass is very easy and you can download all FRP Bypass Tool which can help to Samsung M31 FRP Bypass easily.
Xiaomi Redmi 9i Specifications
Xiaomi Redmi 9i released in July 2020, It has 4GB of RAM and 64/128GB of ROM. The Xiaomi Redmi 9i comes with a 6.53inch with a resolution of 720 x 1600pixels. It runs on MediaTek Helio G25 (12 nm) chipsets and powered by a 4000mAh removable battery. Xiaomi Redmi 9i comes with a 13mp main camera setup and 5mp of single-selfie camera setup.
How to Bypass FRP Xiaomi Redmi 9i MIUI 12
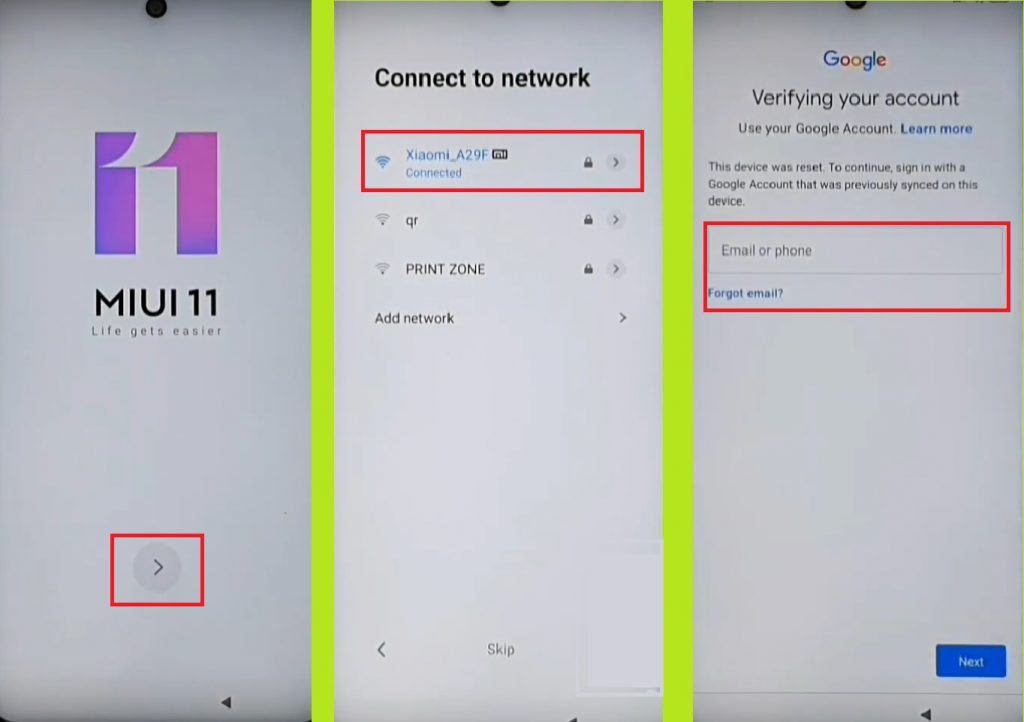
- Firstly, Power ON your Xiaomi Redmi 9i
- Connect your Xiaomi Redmi 9i to a stable wifi connection
- Go to the Google Account Verification screen
- Now go back to WI-FI Screen
- Disconnect your mobile from the Wi-Fi network
- Remove the SIM card if it inserted
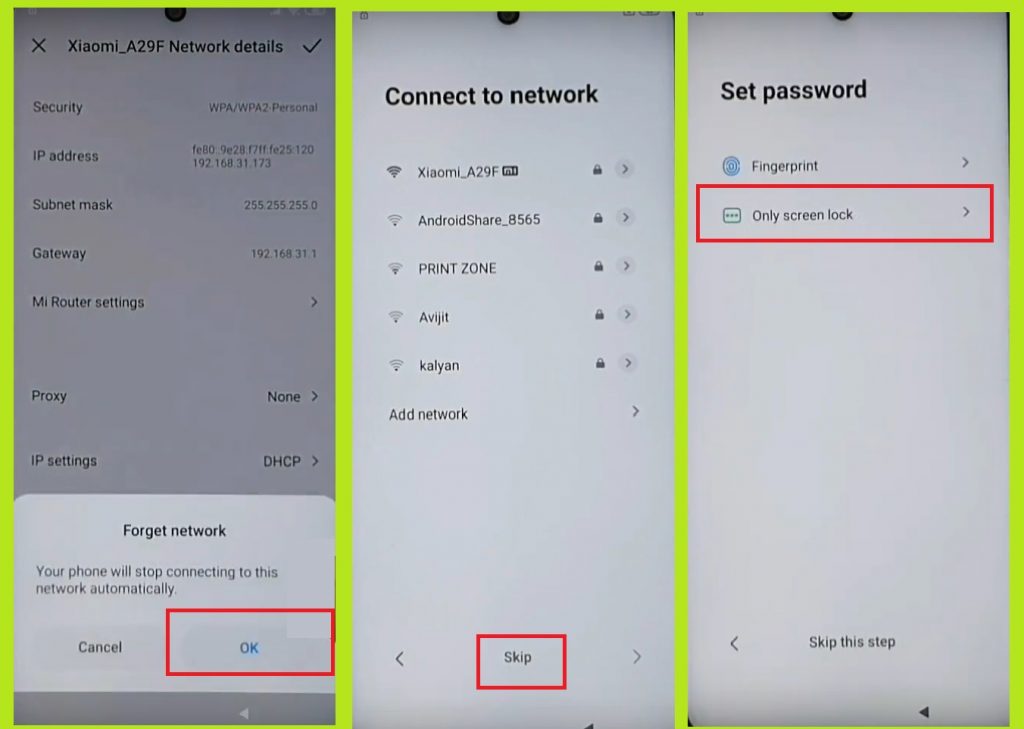
- You will get the SKIP option, tap on that
- Tap next =>> next =>> Accept to setup your phone
- On the Setup Password page, Select Only Screen lock
- Select Pattern lock
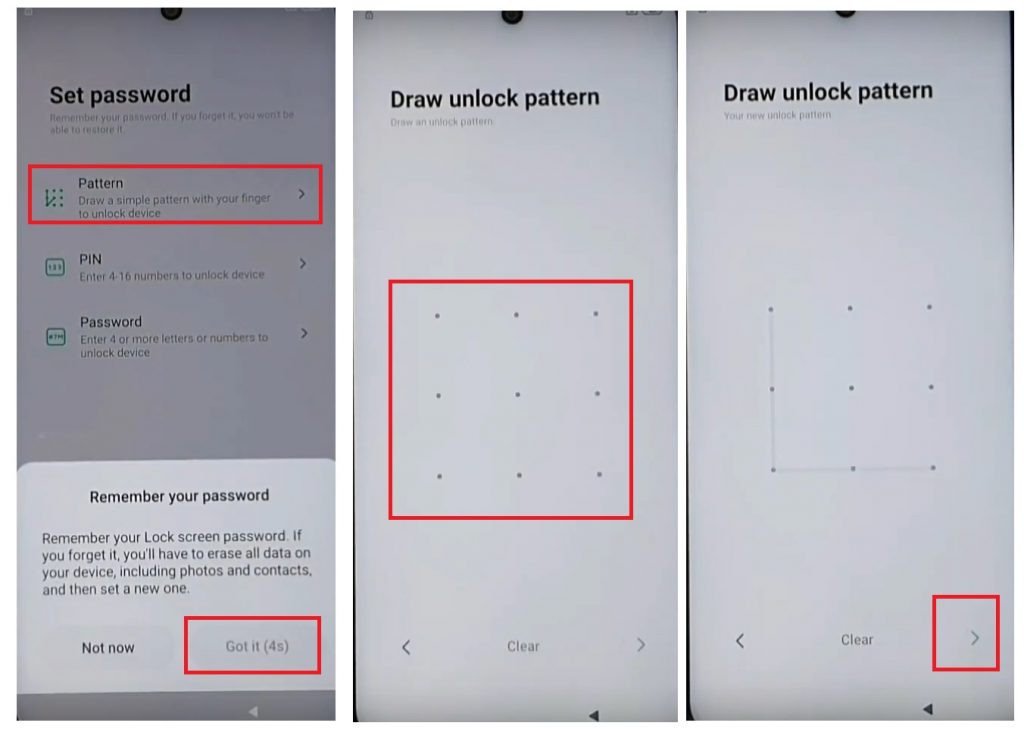
- Draw Pattern
- Tap Next-> Next -> until you see Not Signed IN popup
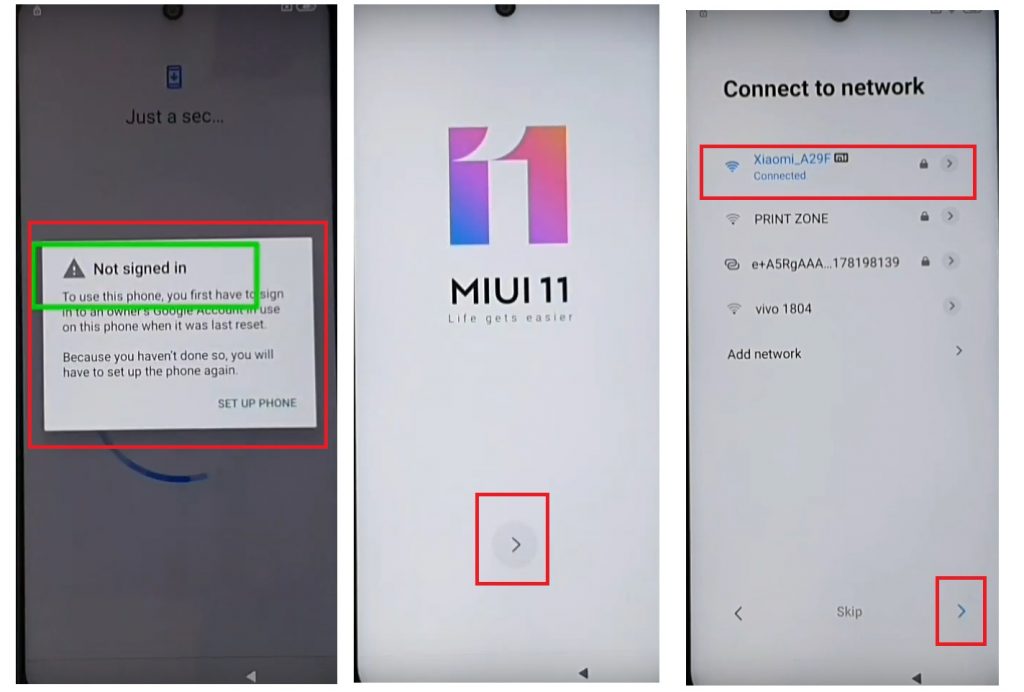
- Again go to the WI-FI screen and connect your Redmi 9i with the WI-FI network
- Now Setup your phone normally
- On the Draw Pattern lock screen, Draw Pattern lock that you setup earlier and tap Next
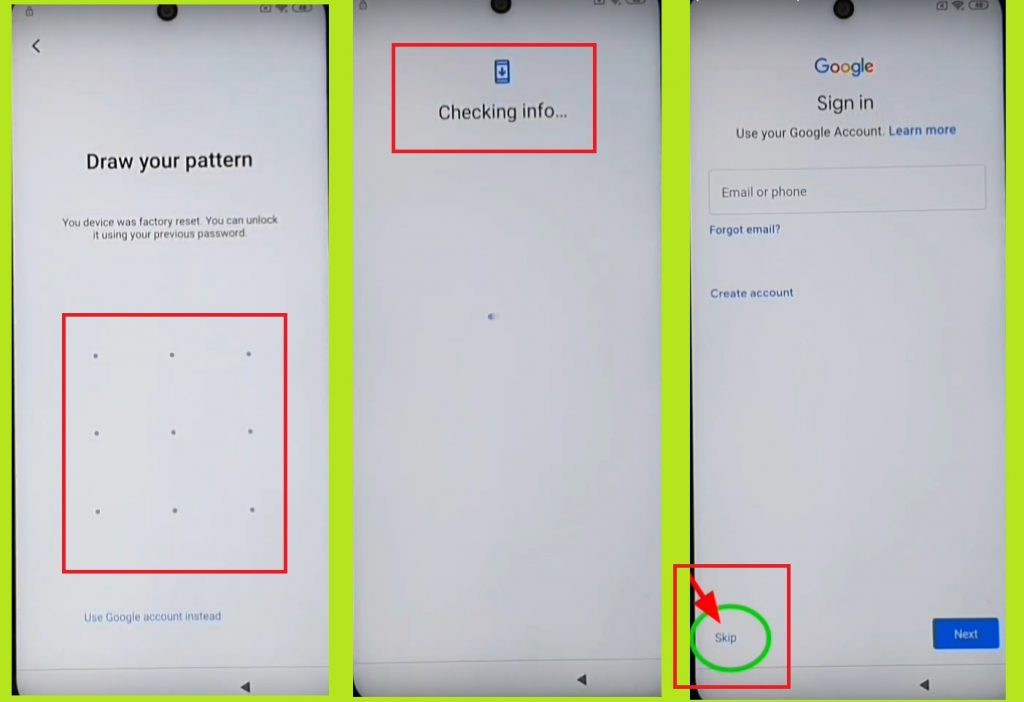
- Now you will get Skip option on the Google Account verification page
- Tap Skip
- Done
- This is the simple way you have to follow to Xiaomi Redmi 9i FRP Bypass (Unlock Google Account) MIUI 12 easily.
Read More: FRP Bypass Tool
4 thoughts on “How to Xiaomi Redmi 9i FRP Bypass | Unlock Google Verification (MIUI 12)”