FRP is a newly added feature in Android phones. After the process of Factory Reset, the phone will ask the user to put the last active Google account used in the phone to verify the actual owner of the device. No doubt it a good feature to avoid misuse of the device. But somehow many users have forgotten their Google ID & Password after the factory reset. In case, if you also facing the FRP lock issue on your phone then here in this tutorial I will guide you to Vivo NEX 3 FRP Bypass | How To Unlock Google Account Android 9.0 without PC very easily. So, follow the below process carefully.
What is FRP?
Android has added the FRP feature in 5.0 Lollipop and the upper version. FRP means Factory Reset Protection and it’s working on most of the latest Android versions (Lolipop, Nougat, Marshmallow, Oreo, pie & Q). Google also pushed security patch update every two months to fix the old FRP bypassing process so that’s why nowadays FRP unlock process has become too challenging with every phone and Android version.
The FRP will automatically activate when a user added a new Google Account ID and Password on your Vivo NEX 3 for the very first time. If you performing the factory reset, then your device will ‘be stuck at the FRP lock verification screen. Now you have to log in with the same Google Account and Password that you set up on your phone earlier. In case, if you lost or your Vivo NEX 3 got stolen then It can’t be accessed by anyone. Here on this page, I share with you a simple and fully working method to Vivo NEX 3 FRP unlock successfully.
How to Disable FRP Lock
The process of disabling the FRP lock is very easy. Just you have to follow these simple steps to disable it easily: Just Goto Settings -> Accounts -> select the Google Account -> check on the right side you will see Delete icon. Just delete the account from there.
The process of FRP Bypass is very easy and you can download all FRP Bypass Tool which can help to Vivo NEX 3 FRP Bypass easily.
Vivo NEX 3 Specifications
Vivo NEX 3 first released was 2019, It has 8/12GB of RAM and 256GB of ROM. The Vivo NEX 3 comes with a 6.35inch with a resolution of 1080 x 2256pixels. It runs on Qualcomm SM8150 Snapdragon 855+ (7 nm) chipsets and powered by a 4500mAh removable battery. Vivo NEX 3 comes with a 64+13+13mp main camera setup and 16mp of single-selfie camera setup.
Do Check: Vivo Y19 FRP Bypass – How To Unlock Google Account | Without PC
How to Bypass FRP Vivo NEX 3 Without PC
- First of all, Power ON your Vivo Phone.
- Then connect your Vivo NEX 3 to a good WI-FI network.
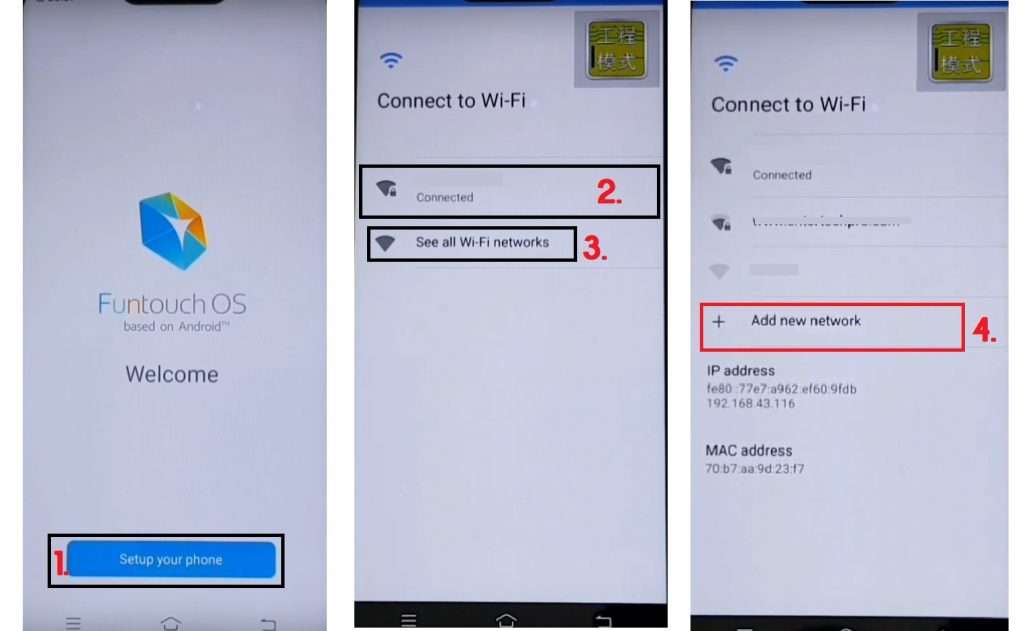
- Tap See All Wi-Fi Networks.
- Click Add New Network.
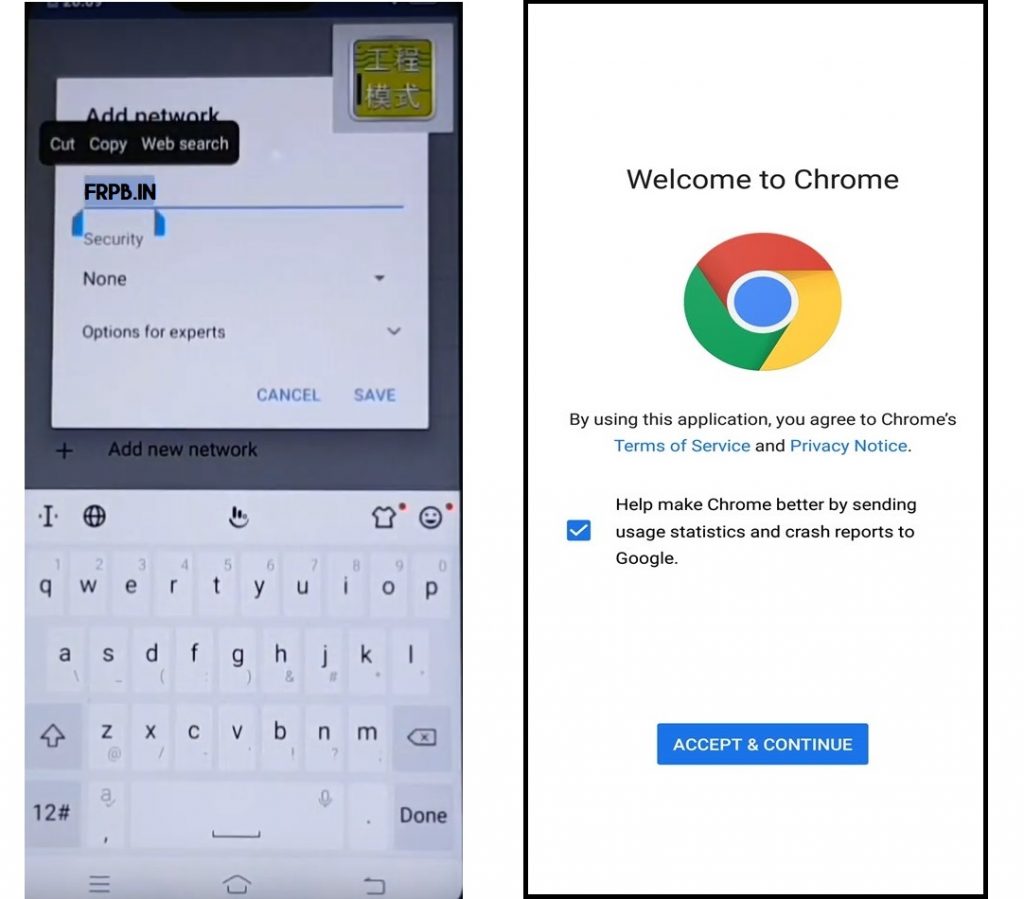
- Type FRPBypass.in
- Tap your finger on the typed text to bring the Cut/Copy/Select All/Web Search options.
- Select Web Search.
- Now you can Access the Chrome Browser to download FRP tools.
- Tap on the Search bar and type:
- It will lead you to the FRP tools page.
- Now download the below application:
- FRP Bypass APK (2.0)
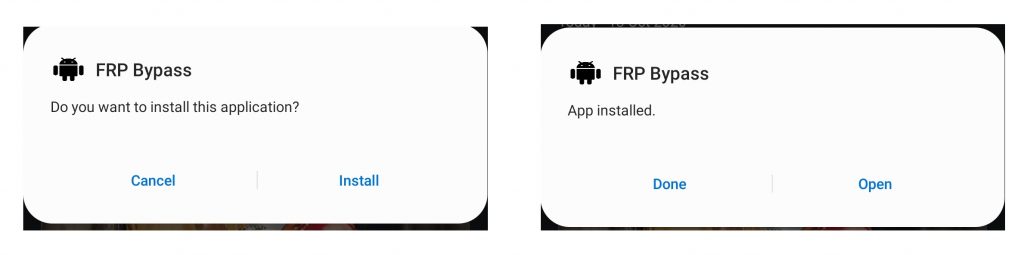
- Go to the Downloads => Install the FRP Bypass apk and Open it.
- Tap on Google Account Manager and Select Google Account Manager (6).apk
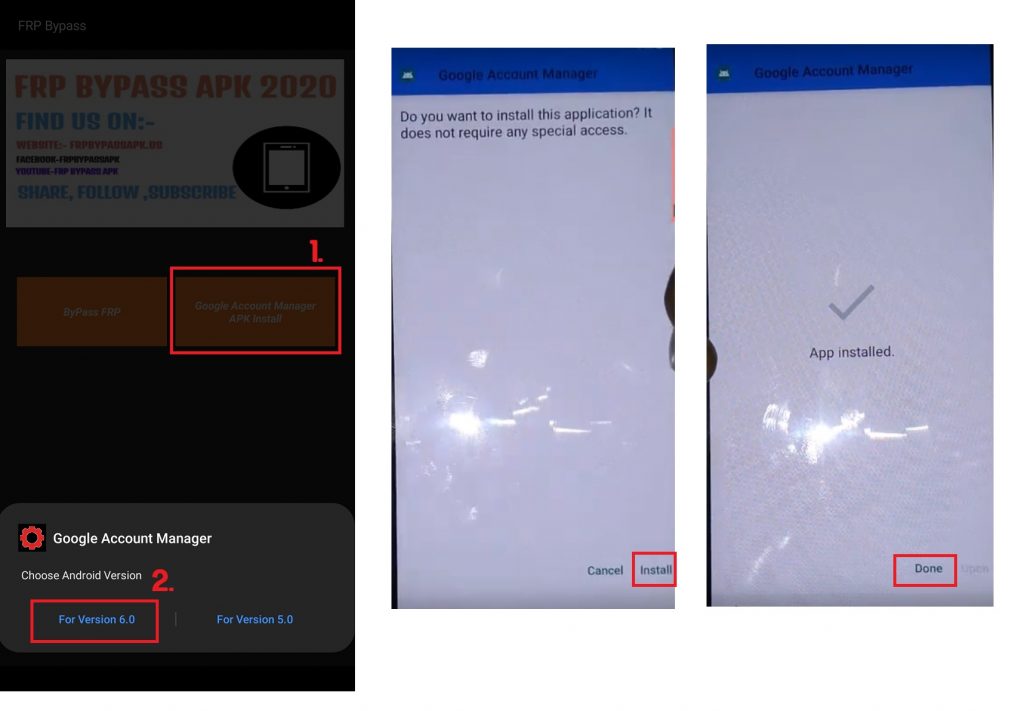
- When the installation process is finished, tap Done.
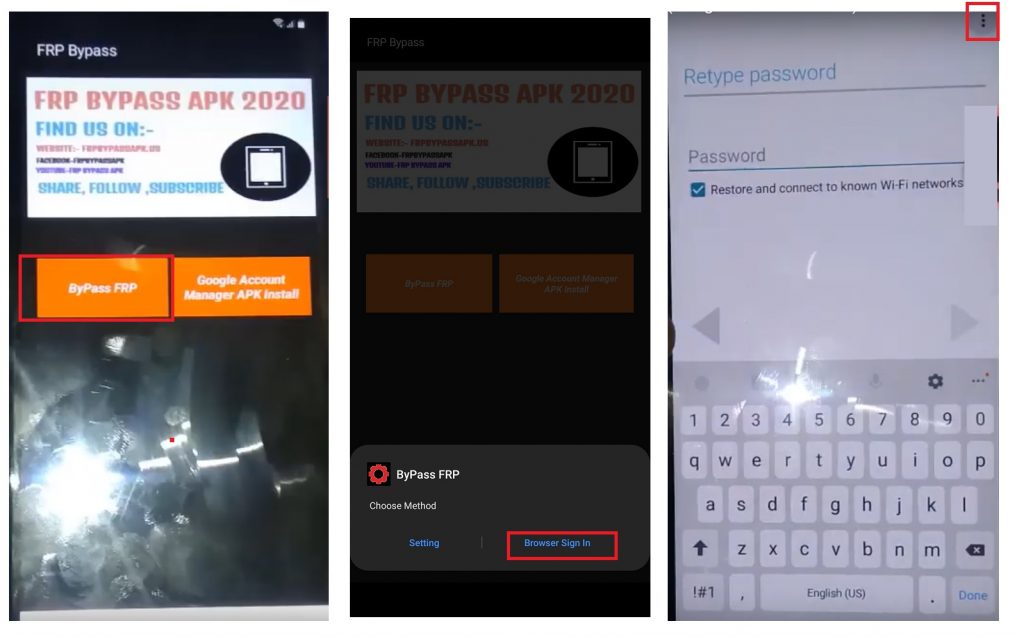
- Now tap on Bypass FRP button.
- Choose Browser Sign IN.
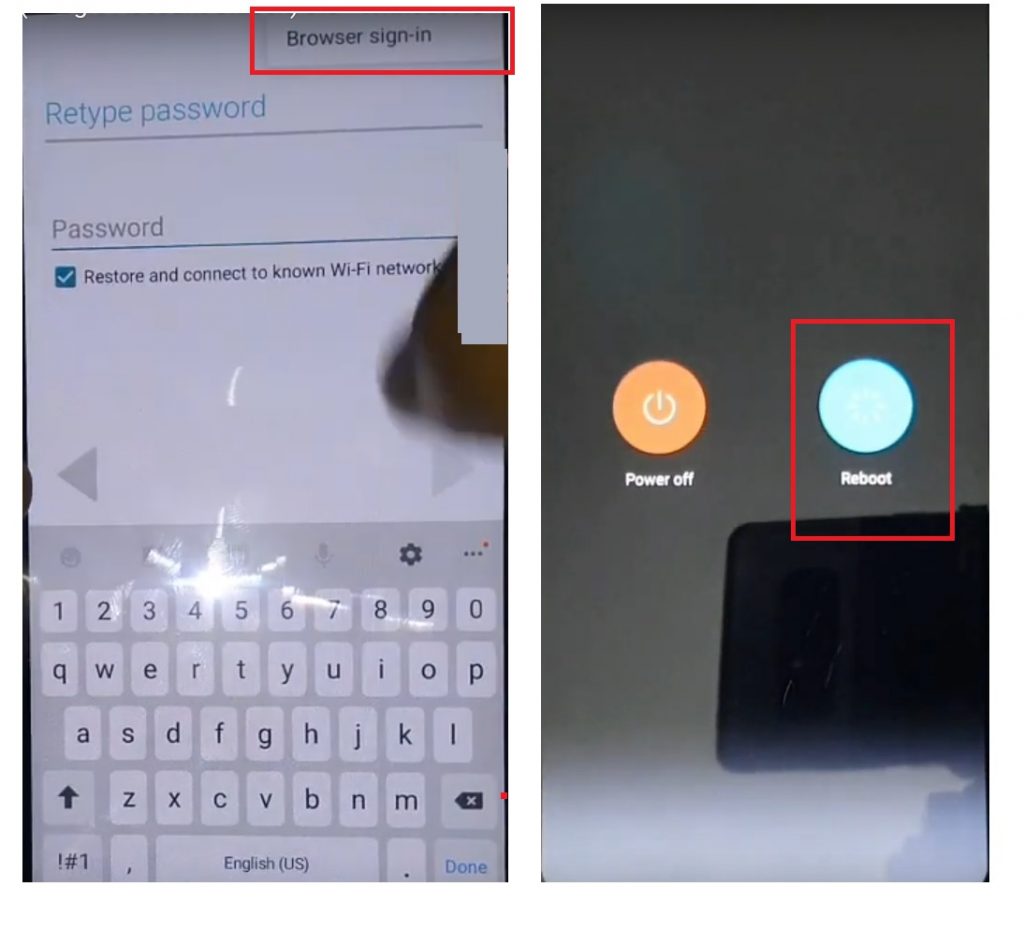
- Tap “3 dots” from the top right corner and chose Browser Sign IN again.
- Now Sign IN with your Gmail ID and Password.
- Restart your Vivo phone.
- Configure the phone normally,
- That’s it.
Read More: Vivo FRP Bypass Tool